The Secret to a Flawless DIY Tile Job (Without Hiring a Pro)
July 7, 2025
There’s something incredibly rewarding about transforming a space with your own two hands. Whether it’s refreshing a dated bathroom, adding personality to a kitchen backsplash, or bringing style to your outdoor patio, tiling is one of the most impactful ways to personalize your home. And the best part? You don’t need to be a pro to get it done—you just need the right guidance, tools, and mindset.
At Tango Tile, we believe every homeowner deserves to feel empowered, prepared, and excited when starting a DIY tiling project. But great results don’t happen by accident—they come from smart planning and thoughtful choices. From selecting the perfect tile to laying the last grout line, this guide will walk you through everything you need to know to create a space that looks professionally finished—and feels uniquely yours.
Let’s get started on your tiling transformation.

Before you dive into your tiling project, take a moment to picture your space. Is it a sleek, modern kitchen? A cozy, rustic bathroom? Or maybe a breezy outdoor patio? The tile you choose will set the tone—not just visually, but in how your space functions and holds up over time. That’s why picking the right type of tile is more than a design choice—it’s a foundation for your entire project.
Whether you’re drawn to the natural charm of stone, the durability of porcelain, or the ease of peel-and-stick, this section will help you understand the pros, cons, and ideal uses of each type so you can make the perfect pick for your space and skill level. Here is what you need to know:
- Ceramic Tiles: A budget-friendly option in a wide range of colors, sizes and finishes. Even though they work like a charm in low-traffic areas, ceramic tiles are porous and less dense than porcelain.
- Porcelain Tiles: Fired at higher temperatures, porcelain tiles are very durable and resistant to moisture, making them an ideal choice for kitchens and bathrooms. Porcelain is a low-maintenance and long-lasting option.
Natural stone tiles are also an amazing option. They bring unique elegance to your floors. You can always choose between these options:
- Marble’s luxurious veining
- Travertine’s warm tones
- Slate’s rustic charm
But keep in mind that natural stone tends to be heavier. You have to put on extra sealing to keep it stain-free. It also demands more upkeep.
Glass tiles will give you a luminous and reflective quality to brighten your space, adding a quite modern flair to it. These tiles work well as accent pieces or backsplashes. But you need to apply special cutting tools and a steady hand since glass is super fragile. Mosaic tiles give you very small and intricate shapes. They create amazing, stunning patterns/textures, but require patience and precision during installation.
| Bathrooms | Kitchens | Outdoors |
| You should prioritize non-slip tiles to prevent slips and falls in wet conditions. Choose textured ceramic or porcelain tiles with a matte finish. | You can opt for stain-resistant and durable tiles that handle spills, heat, and heavy foot traffic; porcelain and glazed ceramic are good options. | You must go with frost-proof, weather-resistant titles that can withstand Portland’s seasonal changes and moisture exposure. |
Pre-Installation DIY Retiling Considerations
Subfloor Assessment
Your subfloor needs to be level and dry. Uneven or moist subfloors make your tiles crack. Wood subfloors can loosen your tiles over time if they aren’t stable enough. Concrete slabs provide reliable foundations for DIY tiling.
Underlayment will create a solid foundation for DIY tiling. Cement backer boards are standard for most projects, offering strength and water resistance. Uncoupling membranes prevent cracks by absorbing movement between the subfloor and tiles. Waterproof membranes are essential in wet areas like showers or outdoor patios.
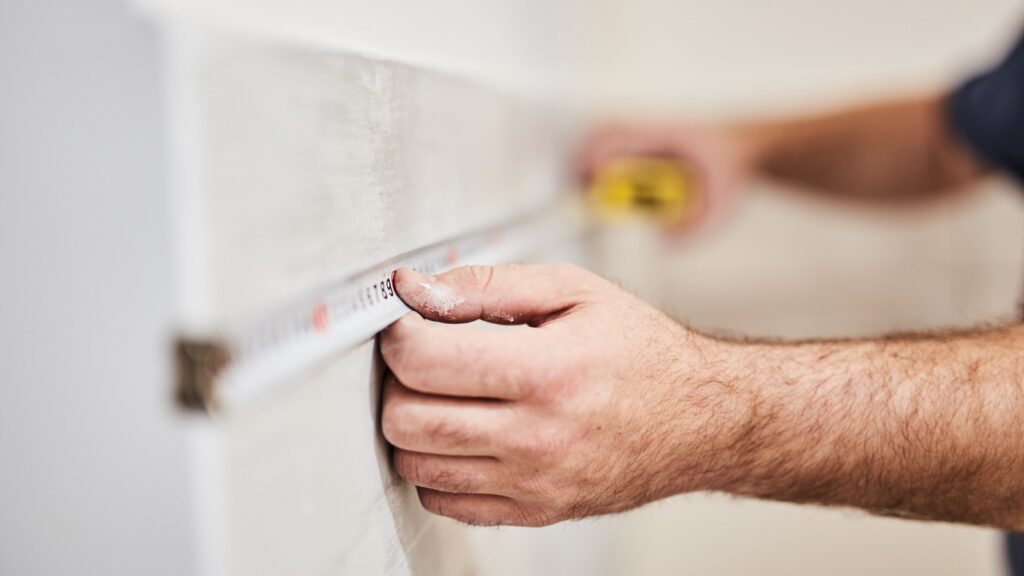
Don’t forget to measure the square footage of the project area first. Always add 10-15% of extra tiles to account for stuff like cuts, breaks, and future repairs.
You should let your tiles rest in the new installation for at least 24 hours (ideally, 48 hours). This step prevents warping or gaps after installation, especially when you have wood-look or natural stone tiles that are prone to thermal expansion/contraction.
You should lay out tiles dry to visualize the pattern they’ll make before applying adhesives. Find the center of your room, making it your starting point. That’s how you can create symmetry and avoid narrow slivers of tile at edges.
Do you want to get perfect right angles for your layout? Using the 3-4-5 method makes sure that your tile rows run square to the walls of your room. This is the method:
- Measure 3 feet along one wall from the corner.
- Measure 4 feet along the adjacent wall.
- Adjust your layout until the diagonal between these two points measures exactly 5 feet.
Snap chalk lines along your reference points to guide tile placement. These lines will keep your rows straight and grout lines consistent, especially in large or irregularly shaped rooms.
| Straight Lay | Diagonal | Herringbone | Running Bond (Brick) |
| Classic grid, which is easy to install | Adds visual space but increases cuts | A dynamic pattern that requires precise cuts | Offsets joints for a traditional look |
If you have the right tools and materials, it can make this project quite successful. We suggest to procure the following materials:
- Essential Tools: Tile cutters or wet saws help you make precise cuts. A notched trowel is required to spread mortar evenly. Tile spacers are necessary to provide consistent and neat grout lines. A level ensures flatness when you’re laying them down. A rubber mallet lets you tap tiles gently. A grout float lets you apply grout. Add a sponge for cleaning to your essential toolkit.
- Materials: Thinset mortar (adhesive) and sealant for natural stone are also must-haves for DIY tile laying. You also need tile edge trim for a clean transition. Grout is one of the most important materials; you should choose sanded grout for joints wider than ⅛ inch, and unsanded for narrower ones.
- Safety Equipment: You need to have gloves to protect your hands. Safety glasses will keep your eyes safe when you’re cutting these tiles. Knee pads are for your comfort. You are now ready for your DIY tiling project.
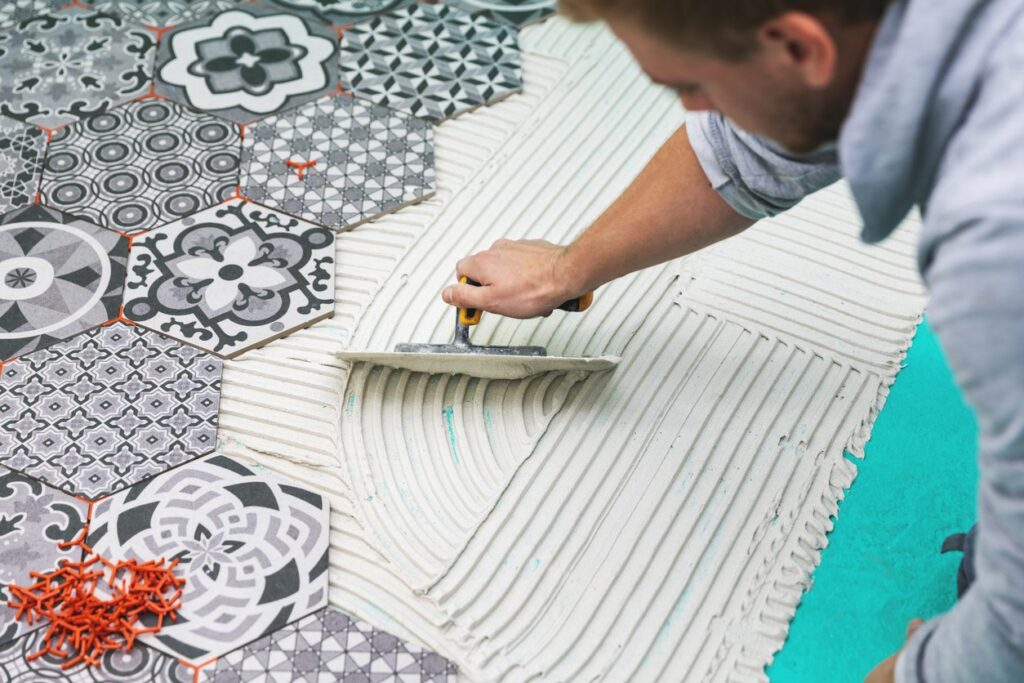
You can start by mixing thinset mortar to a creamy consistency. Almost like peanut butter. Also, you must use the correct notched trowel size. The formula’s simple: Larger tiles require a larger notch; it will spread mortar evenly. Don’t forget to work in small sections to prevent drying before tile placement.
The next step involves pressing each tile firmly into the mortar. You must twist slightly to ensure proper adhesion. Inserting spacers b/w tiles will help you maintain uniform grout lines. Clean excess mortar from tile surfaces right away so the residue doesn’t harden.
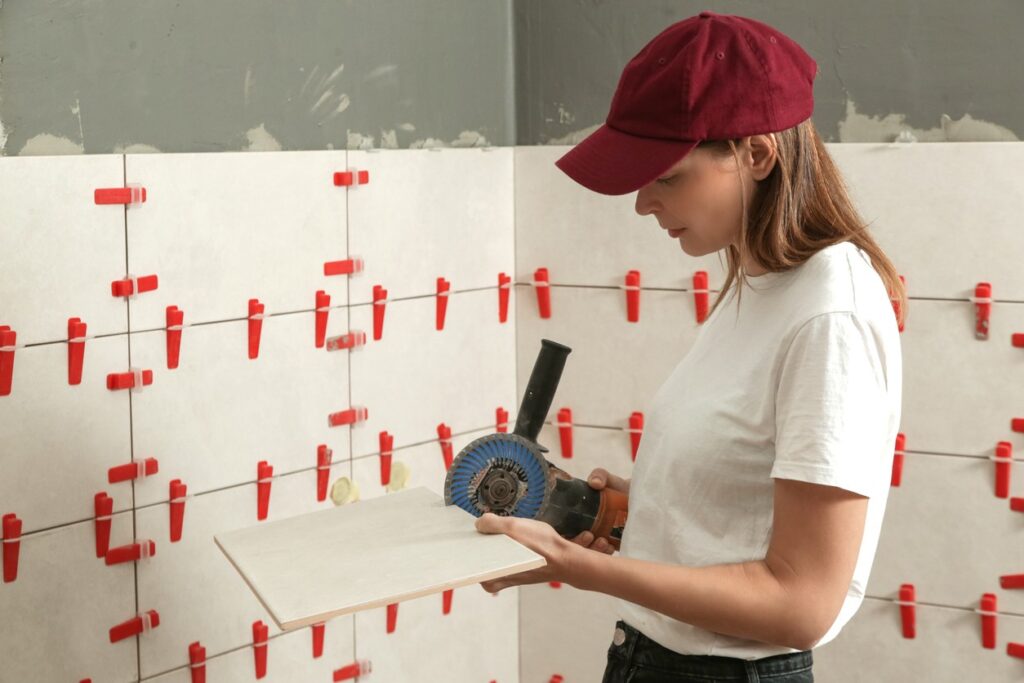
A tile cutter or wet saw can be used at this stage to make straight cuts. But you’ll have to score carefully and snap when making curved cuts around fixtures or outlets; use tile nippers to make this part of the process easy. Take your time and don’t rush yourself. That’s how you get clean, precise edges.
All that’s left now is to wait 24 to 48 hours after tile placement. Only then can you go for grouting (once the mortar is set). How about mixing the grout to a smooth consistency? You should apply it with a grout float, too, pressing firmly into joints. Remove all that extra grout with a damp sponge. Don’t forget to polish your tiles after the haze of the grout dries up. That’s how this project reaches its conclusion.
- Sealing Tiles: You can protect your tiles against stains and moisture by sealing natural stone tiles and certain types of grout.
- Caulking Edges: Applying flexible caulk along the edges is a great way to prevent core tile-related issues like cracking and water infiltration. You should apply this caulk along a joint/edge that’s prone to movement, such as where tiles meet tubs.
- Cleaning and Maintenance: Do a deep clean so you can remove installation residues. You should also maintain tiles with regular sweeping. Use gentle cleaning agents so you can preserve the appearance of your tiles.
- Avoiding common mistakes: Please avoid these mistakes when laying down tiles all by yourself:
- Installing over an uneven or moist subfloor.
- Skipping underlayment or waterproofing where necessary.
- Starting tiling in a corner instead of the center.
- Failing to check tile alignment frequently.
- Grouting too soon or neglecting to seal the grout.
- Leaving grout haze on tiles without proper cleaning.
Tiling your space on your own is a great way to customize your home. But this project requires a careful plan, the right materials, and a lot of patience. You should choose suitable tiles and then prepare your subfloor. Follow precise installation steps and get a flawless finish that stands the test of time.
Share your project results or questions in the comments, or tag us on social media; we love to see your beautiful tile transformations! If you’re ready to start your tiling project now, explore our premium handmade tile collections. We’ll support your DIY journey every step of the way.