Mastering the Art of Tiling: DIY Tips for a Stunning Kitchen Backsplash
January 20, 2024
Revamping your kitchen with a fresh tile backsplash can dramatically alter the space’s look and feel. A tile backsplash is not just about enhancing aesthetics; it also serves to protect your walls from splashes and spills.
Embarking on a DIY backsplash tile project can seem daunting, but with the right guidance, it can be both an enjoyable and rewarding endeavor. It’s an opportunity to showcase your creativity and craftsmanship. Not to mention, it can also be a cost-effective alternative to hiring a professional. With the right preparation, tools, and techniques, you can create a beautiful and durable kitchen tile backsplash that is a focal point in the heart of your home.
Setting the Stage: Preparing for Your Tiling Project
Before you begin the backsplash installation, there are some preparatory steps that you must not overlook. Proper preparation is the foundation of a successful DIY kitchen backsplash.
Choose Your Tiles Wisely
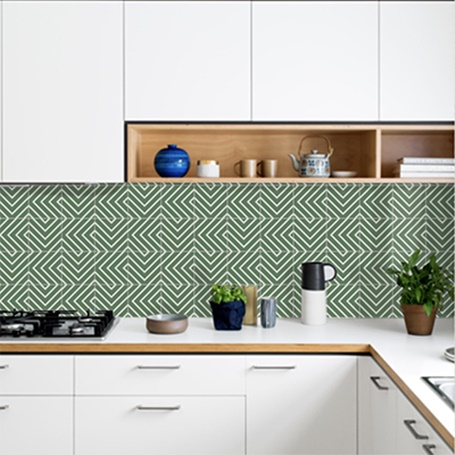
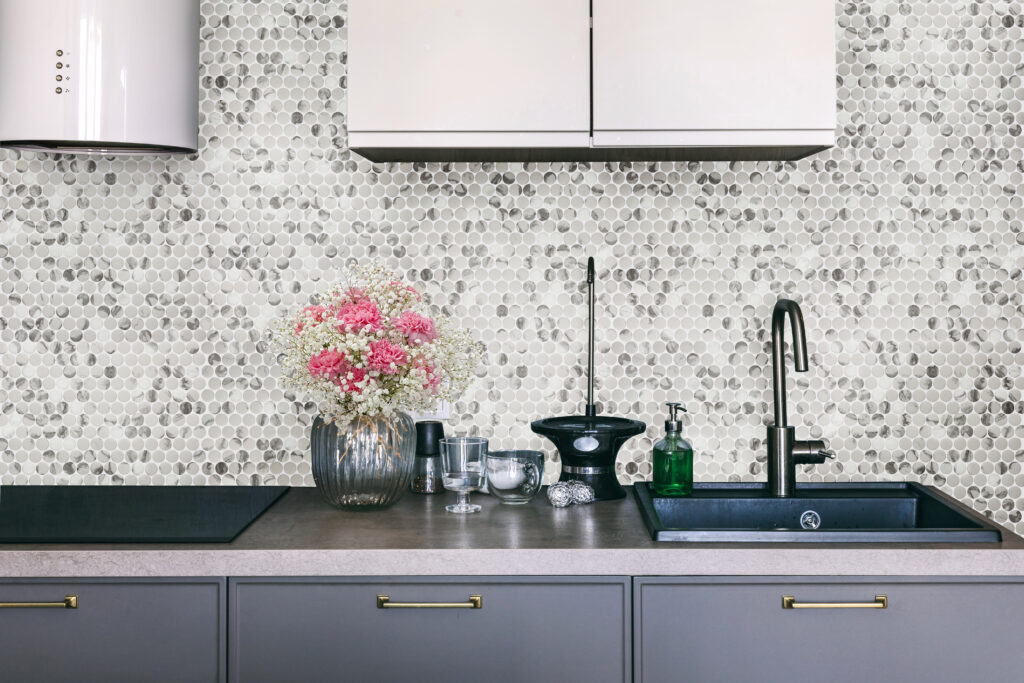
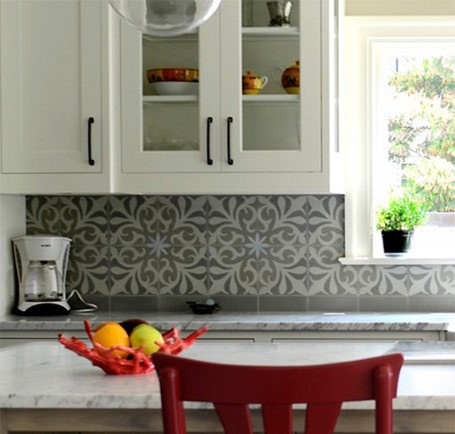
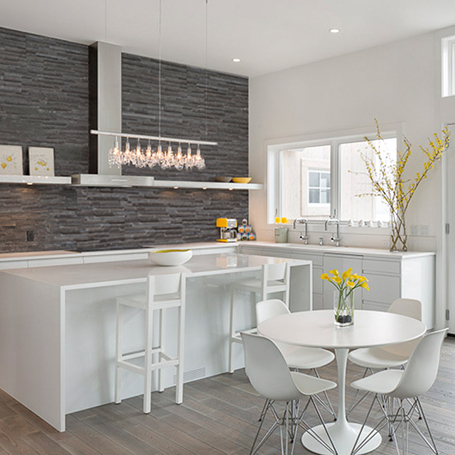
The first step in your tiling journey is selecting the right tiles. Consider the color, shape, size, and how they will complement your kitchen’s style. Are you going for a classic subway tile, a chic glass mosaic, handmade ceramic tile or perhaps natural stone? Do you fancy glossy or matte tiles? Are you going for bold colors or neutral tones? Finally, in keeping with the interior design of your kitchen renovation, do you want a classic look with white subway tile or a more contemporary look with mosaic tile? Each material and tile design has specific considerations, from ease of cutting to the type of adhesive required.
Gather Your Tools and Materials
N/o DIY project can begin without the necessary tools. For a tiling job, you’ll need a notched trowel, tile cutter, spacers, adhesive, and grout, among others. Having everything on hand before you start will make the process smoother and faster.
Mapping It Out: Planning Your Backsplash Layout

Measuring Up
Precision is key when tiling a backsplash. Begin by measuring your space to calculate how many tiles you’ll need. Don’t forget to account for the space between the tiles (where the grout goes) and to purchase extra tiles to cover any mistakes or future repairs.
Dry Layout is a Lifesaver
Before committing to sticking anything to the wall, arrange your tiles on a flat surface to envision the final look. This dry layout is crucial for spotting any potential issues with pattern, color, and cuts that will need to be made around outlets or corners.
Adhering to Excellence: Applying Tiles Like a Pro
Slathering on the Adhesive
The type of adhesive you use is as important as the quality of your tiles. For most backsplash projects, a pre-mixed tile adhesive works well. Apply it with a notched trowel at a 45-degree angle to ensure an even application.
Precision in Placement
Place your tiles onto the adhesive with gentle but firm pressure. Use spacers to keep your lines even and consistent. This will ensure your tiles are not only adhered securely but also aligned beautifully.
The Finishing Touch: Grouting and Sealing Your Backsplash
Choosing and Applying Grout
Select a grout color that complements your tile color scheme. Mix the grout according to the manufacturer’s instructions, then apply it using a grout float. Press it firmly into the spaces between the tiles and then wipe away the excess with a damp sponge.
Sealing for Durability
Once your grout is dry, applying a sealer is crucial to protect your backsplash from moisture and stains. It’s an extra step that will extend the life of your tiling work and keep it looking fresh for years.
Maintenance and Upkeep: Ensuring Longevity
Regular Cleaning
Maintaining the sparkle of your backsplash is relatively straightforward. Regular cleaning with non-abrasive materials will prevent grout discoloration and keep your tiles looking pristine.
Damage Control
In case of damage, having spare tiles means you can easily replace one without having to redo the entire backsplash. Remember, careful use and immediate repair at the first sign of damage can save a lot of time and trouble.
FAQs About a DIY Kitchen Tile Backsplash
1. Can I tile a kitchen backsplash without any prior DIY experience?
Absolutely! Tiling a kitchen backsplash can be a beginner-friendly project. The key is to thoroughly plan your design, have all the necessary materials ready, and follow step-by-step instructions. Start with simpler tile patterns and don’t rush the process. It’s also helpful to watch tutorial videos or attend a local DIY workshop for hands-on experience.
2. What are the best tiles to use for a kitchen backsplash for durability and ease of cleaning?
Ceramic or porcelain tiles are often recommended for kitchen backsplashes due to their durability and ease of maintenance. They can withstand high humidity and are easy to wipe clean from cooking splatters. Additionally, glass tiles are a good option for a stain-resistant and modern look.
3. How do I ensure that kitchen tile backsplash will look professional?
To achieve a professional finish, take your time with the preparation phase – ensure your walls are clean, level, and smooth. Use spacers to maintain equal distances between tiles and be meticulous with your grout application and cleaning. Lastly, a steady hand and patience will go a long way in ensuring a sleek finish.
4. What is the best way to cut tiles for a kitchen backsplash?
The best way to cut tiles depends on the type of tile you’re using. For ceramic and porcelain, a manual tile cutter or a wet saw is typically used. For glass tiles, a glass cutter or a diamond blade on a wet saw is ideal. Always wear safety equipment and follow the tool’s instructions for the best results.
5. How often should I reseal the grout on my kitchen backsplash?
Grout sealing should typically be done once a year to maintain its resistance to moisture and stains. However, this can vary based on the amount of wear and tear your backsplash experiences. Keep an eye on the grout lines; if they start to look dull or begin to absorb water, it’s time to reseal.